Quick Answer: Best Minecraft Bridge Design Method
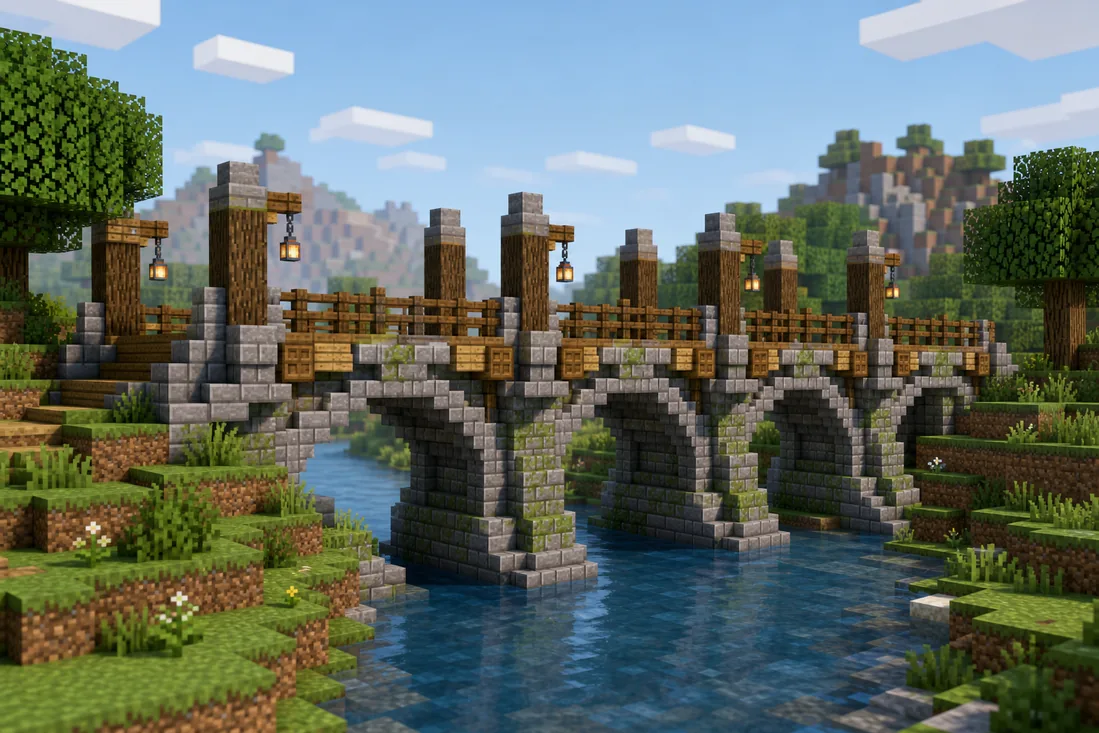
The safest Minecraft bridge design starts with the gap, not the decoration. Measure the span first, choose whether the bridge needs posts, arches or hanging supports, then pick a deck palette that matches the two banks. A small stream can use a simple wood deck and fence rail. A wide river needs stone pillars, repeated arch rhythm or a heavier underside so it looks like it could actually stand.
A bridge should solve movement before it becomes a sculpture. Players need to read where the bridge starts, where the walking lane sits, how the rail protects the edge and how the materials connect back into paths, walls or terrain. If the deck, supports, lamps and side trim all compete equally, the bridge becomes visual noise.
Use a simple ratio for most builds: about 60 percent main deck, 25 percent support and side structure, 10 percent railing or lighting and 5 percent weathering. Larger bridges can use more variation, but every block still needs a role.
Fast bridge design recipe
- Measure the gap and choose short, medium or long-span structure.
- Pick one main deck block before adding side trim.
- Add supports where the bridge touches banks, cliffs, towers or riverbeds.
- Use railings, slabs, trapdoors or walls to make the walking lane readable.
- Blend bridge approaches into nearby path gradients or terrain blocks.
- Place lamps at rhythm points, not randomly across the deck.
Why Minecraft Bridge Designs Work
Good Minecraft bridge ideas combine structure and palette. Wood feels light and handmade, stone feels formal and load-bearing, mossy blocks suggest age, and dark deepslate or blackstone makes a bridge feel heavier. The right choice depends on the span, biome and build style.
Most weak bridge builds fail because the deck floats visually. A bridge over a two-block creek can look fine with logs and fences. A bridge over a ravine needs stronger cues: piers, arches, chains, towers, buttresses, darker underside blocks or terrain anchors.
For exact vanilla block names and version checks, use the Minecraft Wiki block reference before finalizing a survival material list.
Bridge rhythm matters. Repeating posts, arches or lamps every few blocks makes a long bridge feel intentional. The same rhythm also helps players read the scale from a distance, especially when the bridge crosses water, cliffs or a valley.
This is a separate intent from path gradients, wall gradients and floor patterns. A bridge has to handle walking surface, underside, edge safety, vertical support and bank transition at the same time.
If the deck palette feels close but the order is unclear, test nearby block families in the Minecraft Gradient Generator then bring the strongest sequence back into the bridge deck and supports.
12 Minecraft Bridge Ideas and Palettes
Use these Minecraft bridge designs as starting points. Swap blocks for biome, survival availability, bridge length and the amount of contrast your surrounding build can handle.
| Bridge Style | Block Palette | Best Placement |
|---|---|---|
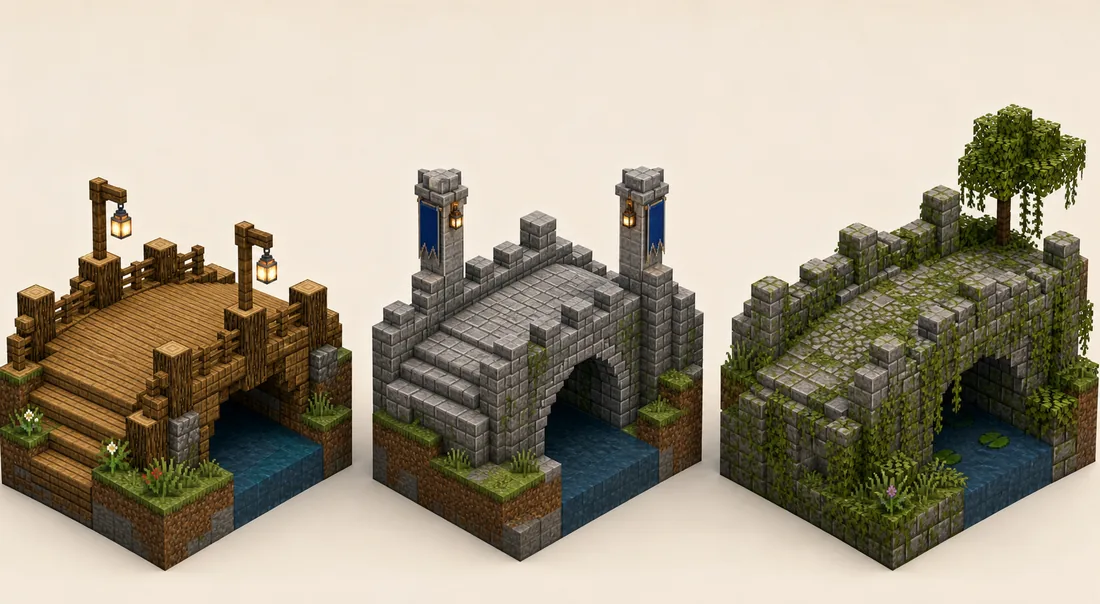
| Starter wooden bridge | oak planks -> spruce slabs -> stripped oak -> fences | Use planks as the deck, logs at the banks and fences for a cheap readable rail. |
| Medieval river bridge | stone bricks -> andesite -> cobblestone -> spruce trapdoors | Let stone carry the arch while spruce adds warm railing and lamp posts. |
| Castle bridge | stone bricks -> cracked stone bricks -> polished andesite -> deepslate tiles | Use darker blocks under arches, towers and side walls to show weight. |
| Overgrown ruin bridge | mossy cobblestone -> stone bricks -> moss block -> vines | Cluster moss at edges, broken corners and bank transitions instead of scattering it evenly. |
| Jungle rope bridge | jungle planks -> bamboo -> stripped jungle -> chains | Keep the deck narrow and use repeated posts or hanging details for rhythm. |
| Desert sandstone bridge | sandstone -> cut sandstone -> smooth sandstone -> terracotta | Use terracotta as trim near towers, stairs and sun-baked side panels. |
| Mountain ravine bridge | spruce planks -> dark oak -> stone -> cobbled deepslate | Anchor both ends into cliffs and darken supports under the span. |
| Nether bridge | blackstone -> basalt -> nether bricks -> crimson planks | Use blackstone for the load-bearing deck and crimson only as rail or accent. |
| Ocean pier bridge | spruce planks -> stripped spruce -> barrels -> sea lanterns | Repeat posts below the deck and use lights at regular dock intervals. |
| Cave bridge | tuff -> andesite -> stone -> deepslate | Brighten the walking line and darken underside blocks toward the cave depth. |
| Modern clean bridge | smooth stone -> quartz -> iron bars -> sea lanterns | Use this only when the surrounding base is clean enough for high contrast. |
| Fantasy arch bridge | calcite -> amethyst -> polished deepslate -> tinted glass | Keep magical blocks near the center feature, portal or tower connection. |
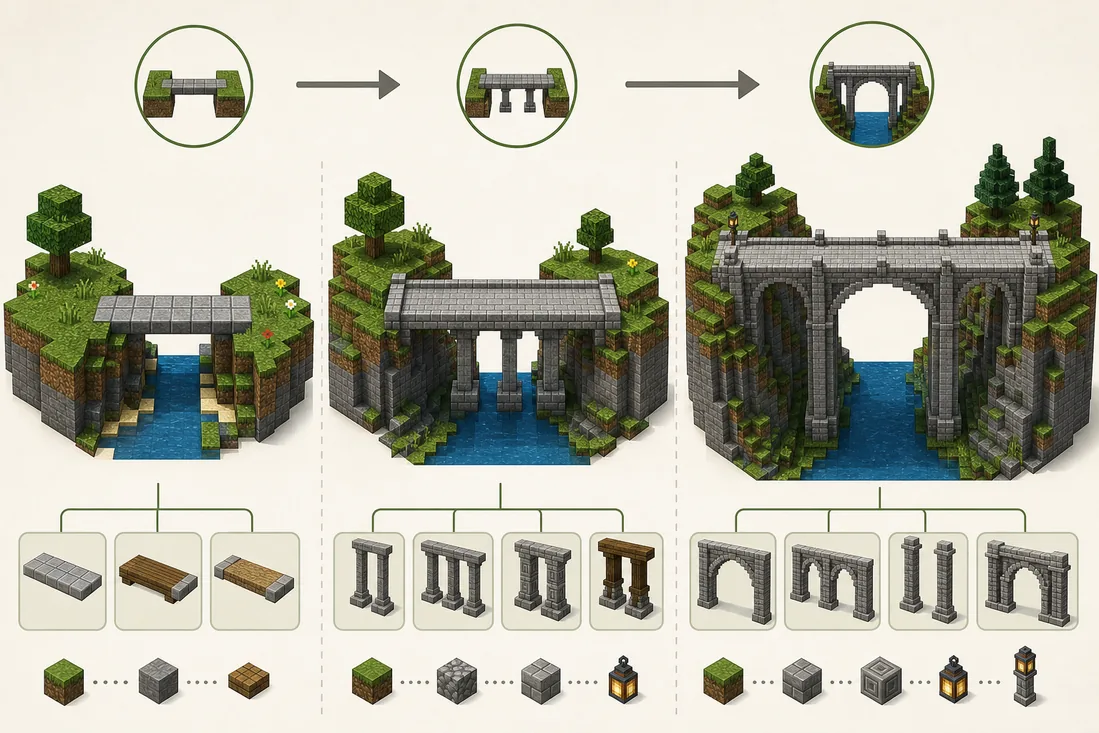
Choose Span and Support Before Decoration
Short bridges across a creek or farm canal can stay simple. A three- to seven-block span usually needs a deck, a rail and bank anchors. Add one or two log posts at the ends and avoid overbuilding the underside.
Medium bridges need repeated support. Once the bridge crosses a river or valley, add posts, piers or small arches every few blocks. Repetition makes the design feel stable and gives you places for lamps, banners or side trim.
Long bridges need a clear structural idea. Use a strong arch, tower pair, suspension line, aqueduct rhythm or heavy pier system. Without a large-scale pattern, a long bridge often looks like a flat road floating over water.
How to Place Bridge Blocks Without Random Noise
Start with the walking lane. Decide whether players move one block wide, three blocks wide or wider, then build the deck around that lane. Slabs, stairs and trapdoors can add shape, but they should not make the path hard to read.
Give supports a darker or heavier palette than the deck. Stone bricks, cobblestone, deepslate, basalt and blackstone work well under the bridge because they read as weight. Wood supports can work too, but they need posts, braces or repeated beams.
Blend both approaches into the terrain. A bridge should not stop abruptly at grass, sand or stone. Use the same logic as a path gradient: rougher blocks near the bank, stronger blocks at the threshold and quieter blocks where the road continues.
Use railings as rhythm. Fences, walls, trapdoors, chains, iron bars and slabs should repeat at consistent intervals, especially on long bridges. Random rails make the bridge feel unfinished.
Deck
The walking surface. It should stay readable enough that players immediately know where to cross.
Support
The load-bearing visual structure: posts, piers, arches, towers, braces or underside beams.
Approach
The bank or road transition that connects the bridge to paths, cliffs, gates or terrain.
Survival-Friendly Minecraft Bridge Designs
In survival mode, start with blocks you can gather in volume. Oak, spruce, cobblestone, stone bricks, andesite, tuff, dirt path and gravel are easier to scale than quartz, sea lanterns, copper, amethyst or polished blackstone.
Use expensive blocks as accents. A few lanterns, chains, sea lanterns, copper blocks or banner details can make a bridge feel designed without turning the whole span into a resource grind. If a block is difficult to farm, keep it near entrances, towers, rail rhythm points or the center feature.
Build a sample module before crossing the whole gap. Test one arch, one support bay or one railing rhythm, then repeat it. This prevents long survival bridges from becoming uneven as materials run out.
Common Minecraft Bridge Design Mistakes
Making the deck float
A bridge needs visible anchors, posts, arches or underside beams when the gap is large. Otherwise it reads like a flat road suspended in air.
Using too many accent blocks
Lanterns, copper, banners, vines, moss and trapdoors all work, but spreading them evenly across the bridge makes the structure noisy.
Ignoring the banks
The best bridge can still look pasted on if both ends do not connect naturally to paths, cliffs, gates or terrain.
Copying a design at the wrong span
A cute creek bridge may fail over a ravine. Scale the support rhythm before copying decorative details.
Forgetting player movement
Rails, posts and stairs should not block the route. The walking lane must stay clear from normal player eye level.
FAQ
What is the best Minecraft bridge design for beginners?
A short wooden bridge with oak or spruce planks, stripped log anchors, fence rails and lanterns is the easiest beginner option. Keep the deck simple and add support only at the banks.
How wide should a Minecraft bridge be?
Small footbridges can be one to three blocks wide. Village, castle and base bridges usually feel better at three to five blocks wide because they have room for railings, lighting and a readable center lane.
What blocks are good for medieval Minecraft bridges?
Stone bricks, cobblestone, andesite, cracked stone bricks, deepslate tiles, spruce trapdoors, fences and lanterns are strong medieval bridge blocks. Use darker blocks under arches and at support points.
How do I make a bridge look supported?
Add piers, posts, arches, underside beams or tower anchors. Repeat those supports at a consistent rhythm so the span looks intentional instead of floating.
Should a bridge use the same palette as the path?
It should connect to the path, but it does not need to match exactly. Use path blocks at the approaches, then let the bridge deck become stronger or more structured over water, cliffs or ravines.
Turn a Bridge Palette Into a Buildable Sequence
Choose the span and support style first, then compare nearby wood, stone or mossy blocks in the generator before rebuilding a full bridge.
Use the Minecraft Gradient Generator