Quick Answer: How to Plan a Minecraft Greenhouse
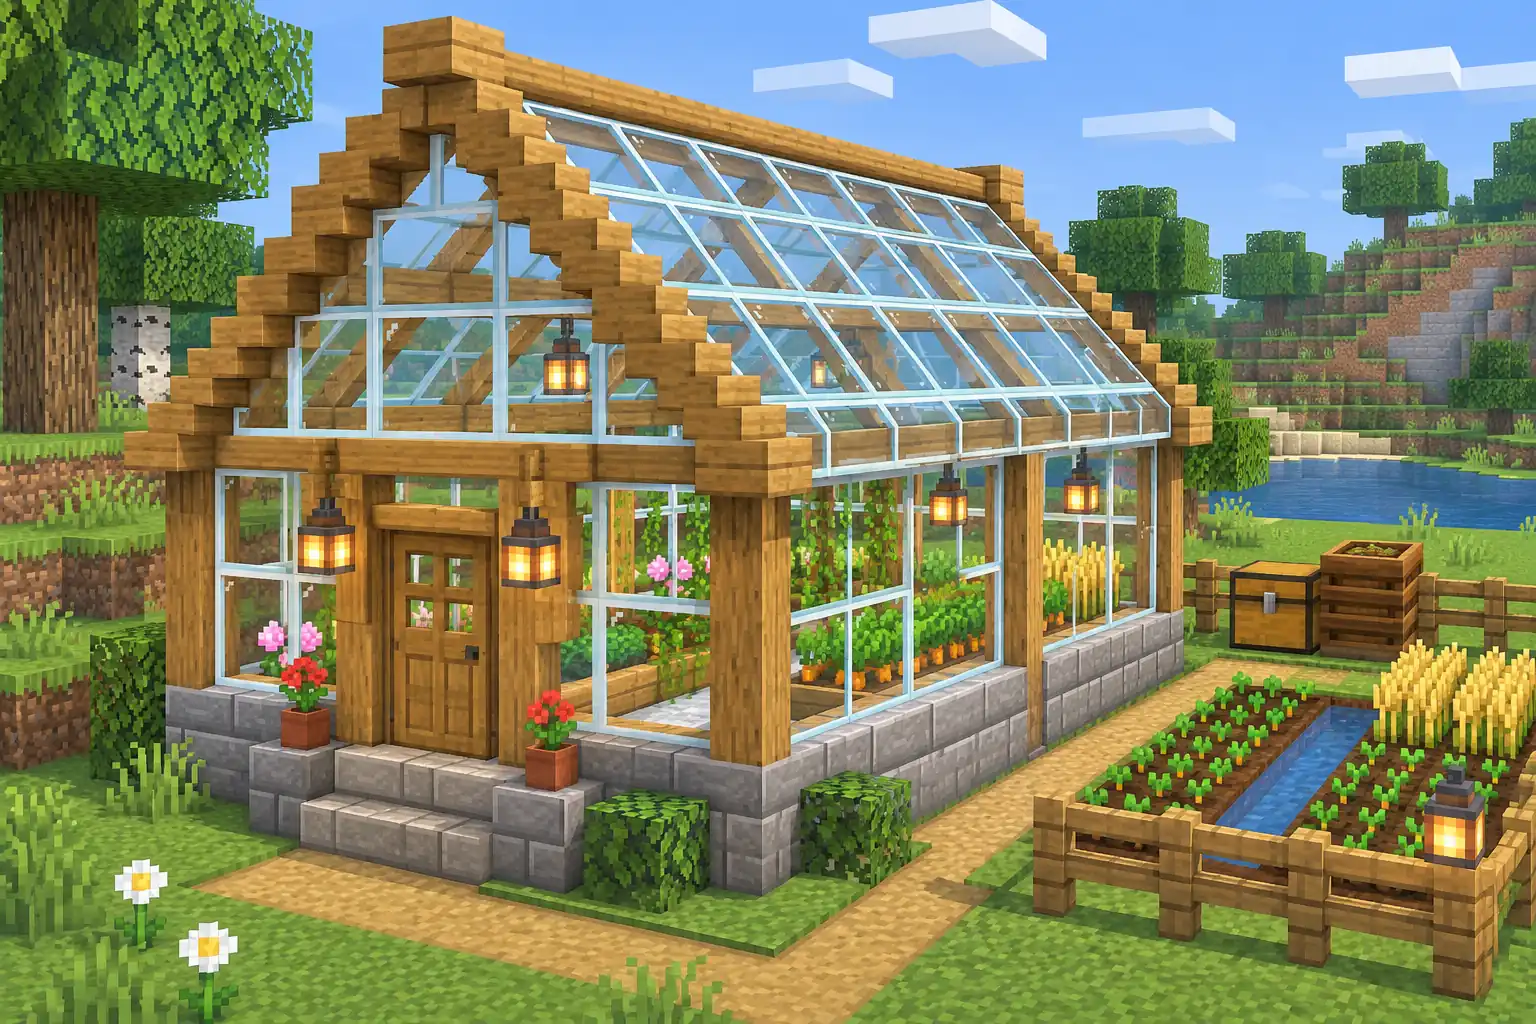
A strong Minecraft greenhouse design starts with a footprint that matches its job. Choose a lean-to for a starter base, a gable room for mixed crops, or a long multi-bay structure for separate growing zones. Mark the entrance and path first, then place the frame, glass, beds, and lighting around that route.
Use glass for the largest wall surfaces and repeat wood or stone supports around it. Shape the roof with stairs or slabs, frame the entrance, and keep one contrasting block for the foundation or trim. Clear proportions make a modest greenhouse feel more finished than a large glass box.
For a decorative build, focus on the roofline and garden connection. For crop farming, reserve room for rows, water, storage, and a walking lane. The purpose determines the footprint.
A Practical Greenhouse Build Sequence
- Pick the purpose: crop production, a garden feature, or a mix of both.
- Mark an entrance, a center path, and a starting footprint such as 7 by 9 blocks.
- Build a low foundation and corner posts before filling the walls with glass.
- Choose a gable, lean-to, or tiered roof and repeat its supports at even intervals.
- Add crop beds, water, lighting, and a small storage point, then inspect the build from outside.
Minecraft Greenhouse Design Rules for Scale and Shape
Treat the greenhouse as a small building with a job, not a glass shell over farmland. Its outline should show the entrance, roof supports, and walking route. A low base, visible posts, and a slight roof overhang give transparent walls a clear frame.
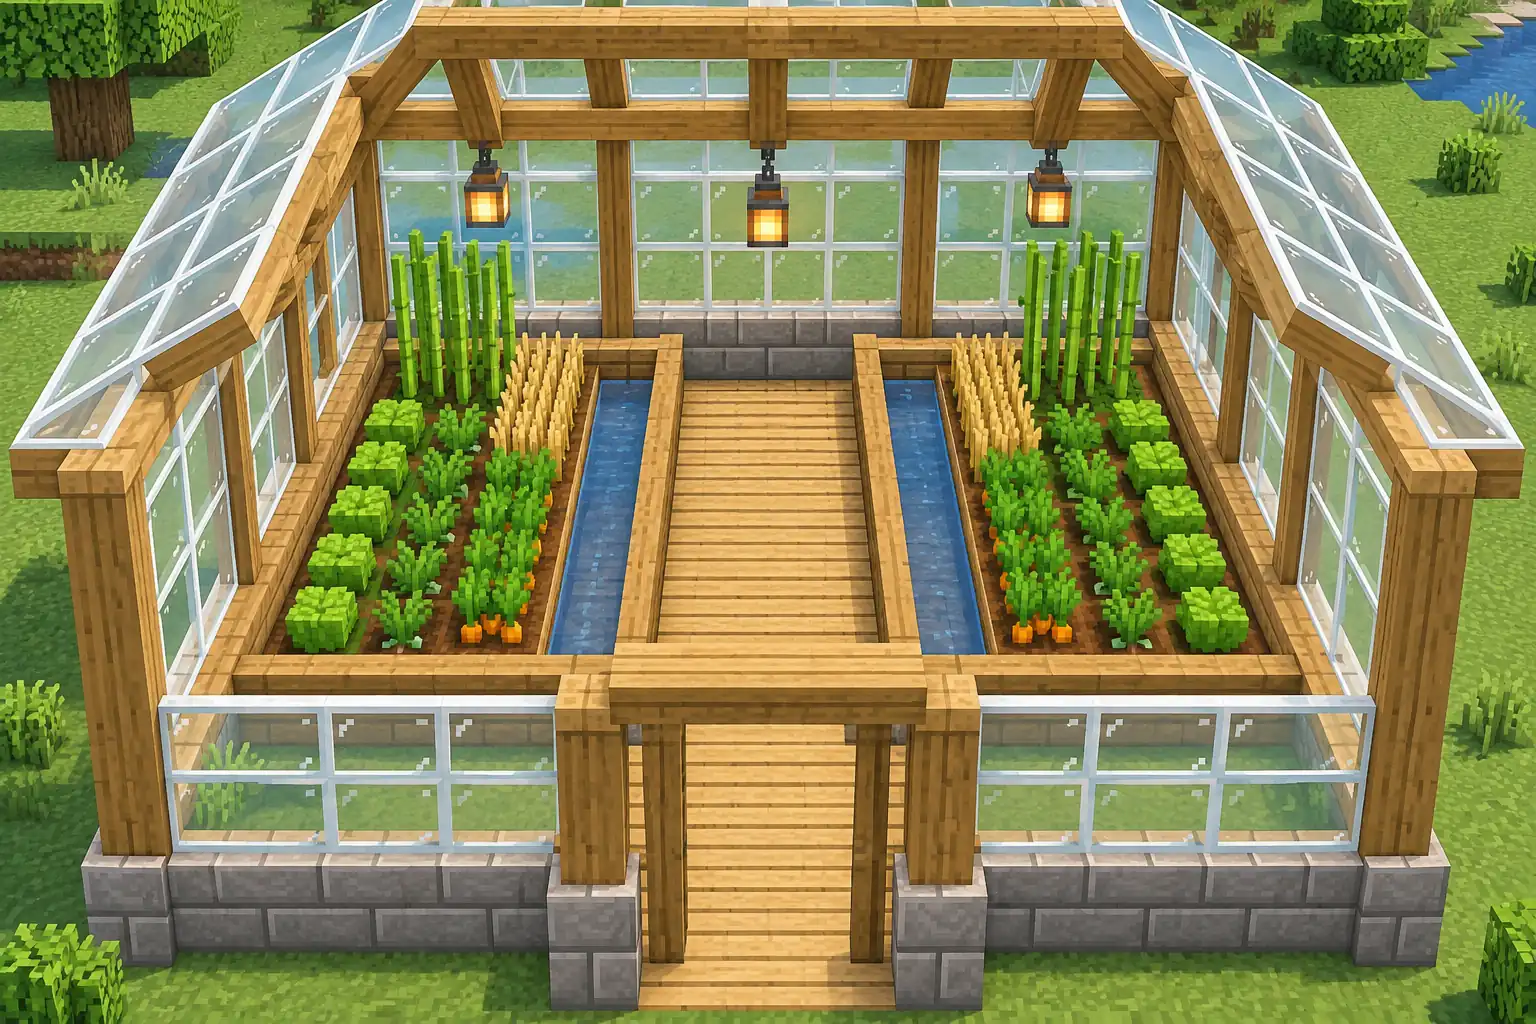
Set the footprint and path first. A 7-by-9-block room can fit a center aisle and beds on both sides; a wider room can add a workbench, composter, barrels, or planters. Align the door with the garden path instead of ending a new route at the wall.
Choose a main frame material before adding glass. Oak or spruce feels warm, while stone bricks or darker wood can look formal. Use another block for the foundation only when it helps the building meet the terrain. A small repeated palette supports the transparent walls.
Separate structure from decoration by placing corner posts and repeating side supports at even intervals. Panes create a lighter grid; full glass blocks look more solid. Test one wall from player height before copying it around the building.
For crop placement and farmland behavior, compare your plan with the Minecraft Wiki crop farming guide . Game rules and available blocks can vary by edition or version, so check the world you are building in.
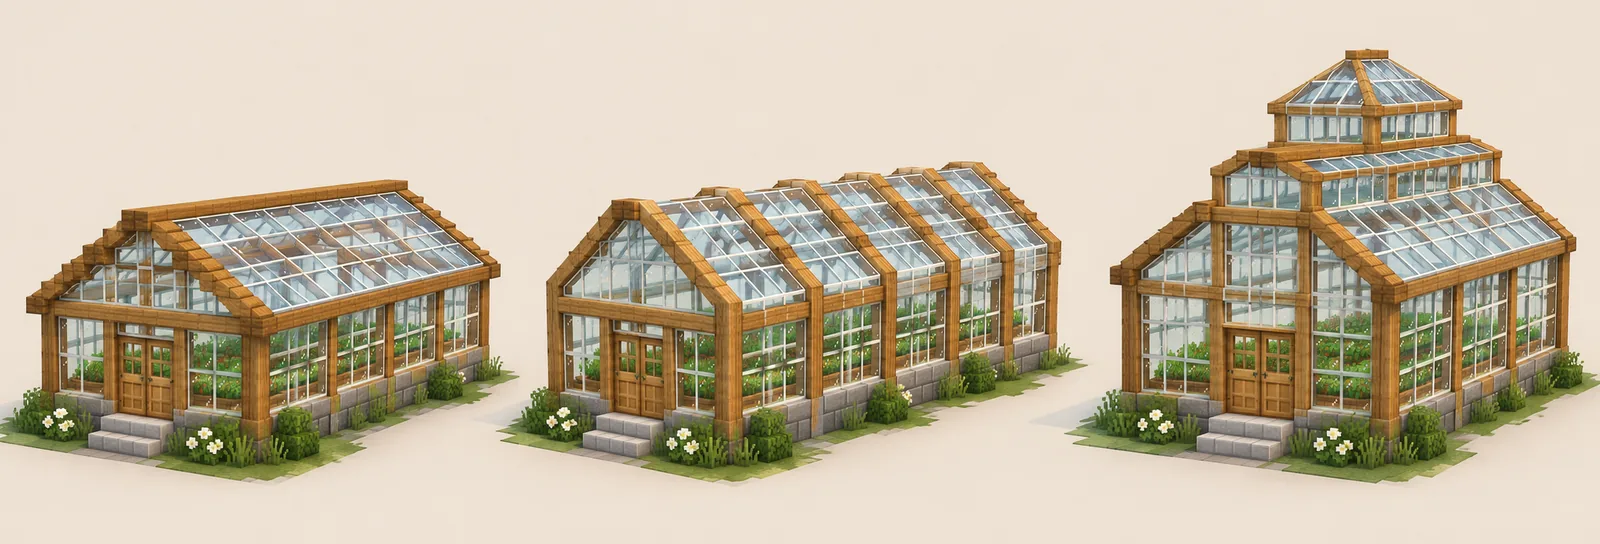
Roof shape changes the same footprint. A gable reads well from a distance and leaves a central ridge for a lantern or vent. A lean-to fits beside a house or cliff. A stepped roof can define connected rooms, but needs visible supports beneath its glass.
Choose height for a reason. A one-story room suits a compact base; a raised center bay can frame a tree, entrance, or water feature above lower crop sections. Center the tallest section or align it with the door to keep the silhouette balanced.
For the surrounding paths and planting zones, use the Minecraft garden ideas guide to connect this structure to the rest of the outdoor layout.
7 Minecraft Greenhouse Layout Ideas
Use these footprints as starting points, then adjust the width to your entrance, crops, biome, and available materials. The sizes are practical planning suggestions rather than game requirements.
| Layout idea | Frame palette | Where it fits | Starting footprint |
|---|---|---|---|
| Lean-to starter house | Oak, glass panes, stone slabs | Attach the high wall to a house or retaining wall; keep the door on the open side. | 5 x 7 blocks |
| Compact gable greenhouse | Spruce, glass, stone bricks | Use a centered aisle with one bed on each side for a small base garden. | 7 x 9 blocks |
| Long crop house | Oak posts, glass panes, cobblestone | Repeat supports along a straight aisle and divide crops into labeled zones. | 7 x 15 blocks |
| Courtyard conservatory | Stone bricks, glass, dark oak | Center a tree, fountain, or seating nook and keep planting around the edge. | 11 x 11 blocks |
| Tiered central bay | Spruce beams, glass, stone trim | Raise the middle roof over the entrance or a tall focal plant. | 11 x 15 blocks |
| Hillside greenhouse | Stone foundation, oak, glass | Step the foundation with the slope and keep the main floor level inside. | 7 x 11 blocks |
| Garden pavilion | Cherry or oak, glass panes, leaves | Use a square pavilion for seedlings, seating, or a decorative garden center. | 9 x 9 blocks |
How to Build the Frame, Roof, and Interior
Mark the corners with temporary blocks and walk the route before building upward. Connect the entrance to the far end without crossing crops or water. On a 7-by-9 footprint, a two-block aisle leaves planting strips on both sides; a wider room can add a cross path to divide zones.
Build the foundation and frame together. A one-block stone or brick base gives the glass a stopping point and helps on uneven ground. Add corner posts, door framing, and repeated side supports. Keep spacing even unless one bay is meant to stand out.
For a gable, use stairs on the slope and slabs or full blocks at the ridge. A lean-to runs from a high wall toward the garden with a small overhang. Tiered roofs can raise the center above lower side bays. Panes make the roof lighter; full glass blocks create a more continuous surface.
Group crops by height, harvest cycle, or color rather than filling every tile. Place water beside the beds it serves, and keep a path between zones when the room is both decorative and productive. Barrels, a composter, lanterns, or pots can finish a corner without blocking the door.
Check the build from the garden path, entrance, and interior aisle. Look for a roof that disappears against the sky, posts that obstruct the door, or crops hidden behind the base. A small trim or lighting change can help more than another roof layer.
Measure
Mark the entrance, footprint, aisle, and crop strips before placing permanent blocks.
Frame
Repeat corner posts and side supports so broad glass surfaces still look structurally intentional.
Glaze
Choose panes or blocks, then test one wall and roof bay before copying the pattern.
Furnish
Add water, lighting, storage, and decoration while keeping a direct route through the room.
A Survival-Friendly Minecraft Greenhouse Build Order
Set the footprint before gathering costly materials. Common wood, cobblestone or stone bricks, glass, stairs, slabs, and lanterns can form a survival build. If glass is limited, use panes for broad walls and save full blocks for the entrance and roof details.
Build in stages: level the site, mark the path, lay the foundation, raise the frame, close the roof, and fill the walls. Adjust the pitch and support spacing before glazing every side. Add crops and storage after the shell is complete.
Check lighting and access in the world where the greenhouse will be used. Inspect it at night and from the entrance, and keep water, composting, and storage reachable without crossing a decorative focal point. Distinct crop zones are easier to expand.
Common Minecraft Greenhouse Design Mistakes
Making the whole build a glass box
Without a base, posts, or a roof edge, transparent walls erase the silhouette. Add a repeating frame and a clear entrance.
Choosing a roof before the footprint
A large roof can overwhelm a small room. Mark the width and support rhythm first, then choose a pitch that fits.
Leaving no aisle
Rows that touch the door or fill every floor tile make the room awkward to use. Reserve a direct walking line before planting.
Mixing too many frame blocks
Several woods, stones, and bright trims compete with the glass. Keep a main frame, a foundation, and one accent.
Ignoring the surrounding garden
A greenhouse can feel detached if its path, entrance, and palette do not connect to nearby builds. Repeat one material or route from the garden.
Minecraft Greenhouse Design FAQ
What is a good size for a Minecraft greenhouse?
A 7-by-9-block footprint can fit a center aisle and beds on both sides. Use a lean-to for a starter base or expand into multiple bays for separate crop zones.
What roof is best for a Minecraft greenhouse?
A gable is easy to recognize, a lean-to fits a house or hillside, and a tiered roof suits a larger conservatory. Choose after the footprint so the height stays proportional.
Should I use glass blocks or glass panes?
Panes create a lighter grid; full glass blocks make a more continuous wall or roof. Test a small framed section before repeating either choice.
How do I make a greenhouse useful in survival mode?
Keep an aisle from the door, group crops into beds, and place water and storage within reach. Use common frame materials and reserve extra glass for visible areas.
How can I make a Minecraft greenhouse look less plain?
Add a foundation, repeating posts, a framed door, and one accent material. Connect the entrance to a garden path and use lighting or a raised bay as a focal point.
Choose a Block Palette Before You Build
Compare nearby wood, stone, and accent blocks, then carry a small, consistent palette from the greenhouse frame into the garden path.
Open the Minecraft gradient generator